If you're a lash artist or lash enthusiast, you've probably stumbled across countless "lash hacks" on social media and beauty blogs. But beware! Many of these quick fixes and trendy techniques can seriously damage your natural lashes and even cause irritation or other issues. Let's dive into some popular lash hacks and examine why it's best to steer clear of them.
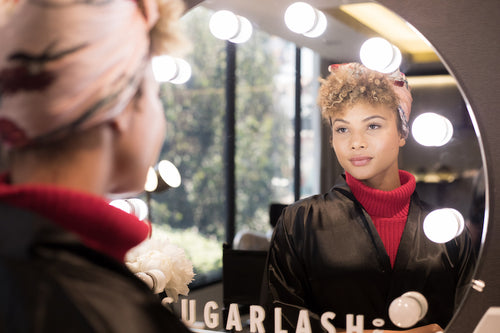
Sugarlash PRO is a leading lash extensions supplier and educator with a mission to empower lash artists globally. We're committed to promoting healthy lash practices, including debunking harmful myths.
Myth #1: Using Baby Powder for Fluffy Lashes
-
Why It's Bad: Baby powder, made primarily from talc, severely dries out lashes leaving them brittle and prone to breakage. It can also irritate the delicate skin around the eyes.
-
What to Use Instead: Achieve fluffier lashes through volume layering techniques to add texture and dimension.
Myth #2: Removing Lash Extensions with Olive Oil or Coconut Oil
-
Why It's Bad: These oils leave residue that traps dirt and bacteria, increasing the risk of eye infections. The weight of the leftover oil can also weaken the natural lash bond.
-
What to Use Instead: Visit your lash artist and have them remove your set with a professional grade remover.
Myth #3: Heating Your Eyelash Curler for More Lift
-
Why It's Bad: Extreme heat severely damages your eyelashes, making them weak and susceptible to breakage. You could also burn your delicate eyelid skin.
-
What to Use Instead: Choose the right curler for your eye shape or opt for a lash lift to get a long-term curl.
Myth #4: Reusing Old False Lashes Without Proper Cleaning
-
Why It's Bad: This leads to bacteria build-up posing a risk for eye infections. Old glue and debris also compromise the lash band, making application difficult and causing potential irritation.
-
What to Do Instead: Clean your lashes after each use with a lash cleanser or alcohol-free makeup remover. Even with proper cleaning, false lashes have a limited lifespan, so replace them when they become misshapen or unhygienic. If you’re looking for a more long term option, it might be time for lash extensions.
Myth #5: Sleeping in Mascara
-
Why It's Bad: Sleeping in mascara causes lashes to become stiff and brittle, leading to breakage when you try to clean them.
-
What to Use Instead: Remove your mascara every night with a gentle eye makeup remover designed for sensitive eyes. If you’re looking for a lower maintenance choice, opt for a lash lift with tint or a set of extensions.
Myth #6: Washing Lash Extensions With Baby Shampoo
-
Why It’s Bad: Just because it’s gentle doesn’t mean it’s suitable for use on lash extensions. There are oil derived ingredients in these shampoos that could damage your extensions.
-
What to Use Instead: Opt for a foaming lash cleanser like LashPURE Cleanser or Cleansing Base. If you’re looking for something more gentle, try Sugarlash Society’s Gentle Gel Cleanser.
Myth #7: Using Hair Dye as Lash Tints
-
Why It's Bad: Hair dye formulations are far too harsh for the delicate eye area and pose a serious risk of blindness, severe allergic reactions, and chemical burns around the eyes.
-
What to Use Instead: Only have your lashes tinted by a licensed lash artist using products specifically designed for eyelashes.
Myth #8: Trimming Lash Extensions
-
Why It's Bad: Trimming leaves blunt, unnatural-looking ends, and affects future fills by disrupting the growth cycle of your lashes.
-
What to Do Instead: Communicate with your lash artist if your extensions feel too long or uneven. They can expertly adjust them for you at your next appointment.
Conclusion
Social media trends and online "hacks" can be alluring, but it's crucial to prioritize the health and safety of your lashes. The misinformation surrounding lash care can have long-lasting consequences. Always choose safe and proven practices to protect those gorgeous lashes!
Here are key takeaways:
-
Consult Professionals: Lash artists are trained in the safest and most effective lash enhancement techniques. Rely on their expertise.
-
Prioritize Hygiene: Thoroughly clean your lashes, avoid reusing old lashes, and always remove makeup before bed.
-
Quality Counts: Invest in good quality products designed for lash extensions to avoid damaging your natural lashes.
-
Be Patient: Healthy, beautiful lashes take time. Avoid quick fixes that might offer immediate gratification but cause long-term harm.
By following these tips and seeking reliable information, you can enjoy beautiful lashes that will last! At Sugarlash PRO, we are committed to providing lash artists and their clients with the tools and knowledge they need to promote healthy and stunning lashes.